Introduction
Braiding Black hair is both an art and a tradition deeply rooted in African culture. Not only does it serve as a beautiful expression of style and individuality, but it also functions as a powerful method of protection for natural hair. For many, styles like box braids, cornrows, and knotless braids have become a go-to, providing versatility, ease of care, and a chance to explore unique, intricate looks. These styles are especially popular for their ability to safeguard natural hair from the daily wear of styling and environmental exposure, making them ideal for anyone looking to keep their hair healthy and vibrant.
Understanding how to braid Black hair isn’t only about achieving a particular style; it’s about grasping the techniques that make these braids last while keeping your hair strong, including techniques for the Dutch braid. From knotless braids that reduce tension to traditional cornrows that lend themselves to endless creative patterns, there’s a world of braiding options that cater to every lifestyle, personality, and preference. In this guide, you’ll learn the most popular styles, techniques for at-home braiding, and maintenance tips to ensure your braids remain stunning and well-kept.
Popular Braiding Styles for Black Hair
Braiding styles for Black hair are as varied as they are beautiful, allowing for a multitude of looks that cater to different needs, from practicality to bold expression. For those seeking a protective style that also allows for creative exploration, these styles offer the perfect solution. Here’s a look at the most popular options:
1.Box Braids
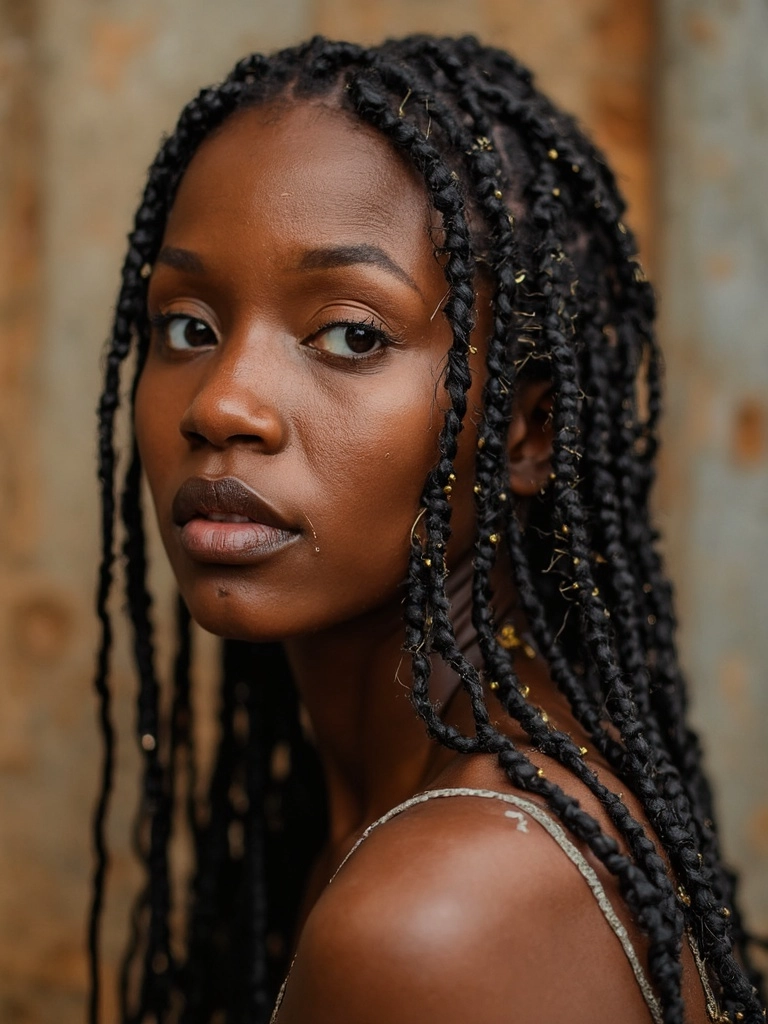
Box braids are perhaps the most widely recognized of protective hairstyles. Created by sectioning hair into small squares, these braids are versatile, with the option to vary braid size and incorporate extensions for added length and fullness. Box braids are known to last up to eight weeks with proper maintenance, making them a low-maintenance choice that’s perfect for those with busy lifestyles. Additionally, box braids can be styled in various ways—whether it’s up in a bun, left flowing, or accessorized with beads and cuffs.
2.Knotless Braids
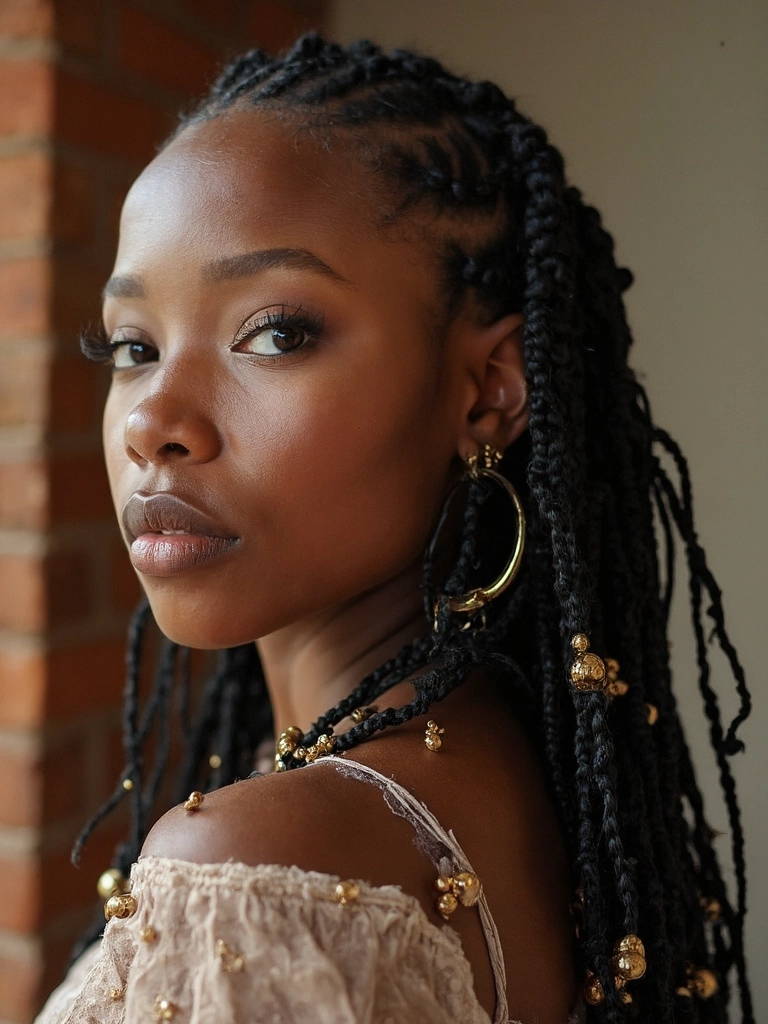
Knotless braids are a modern twist on the traditional box braid. They’re created without the knots that typically anchor the braid at the scalp, offering a smoother, more natural look that reduces tension on the hairline. This style has gained popularity for its comfortable wear and protective benefits, particularly for those prone to scalp sensitivity. Knotless braids are a great choice for long-term wear, as they can be customized in thickness, length, and color.
3.Cornrows
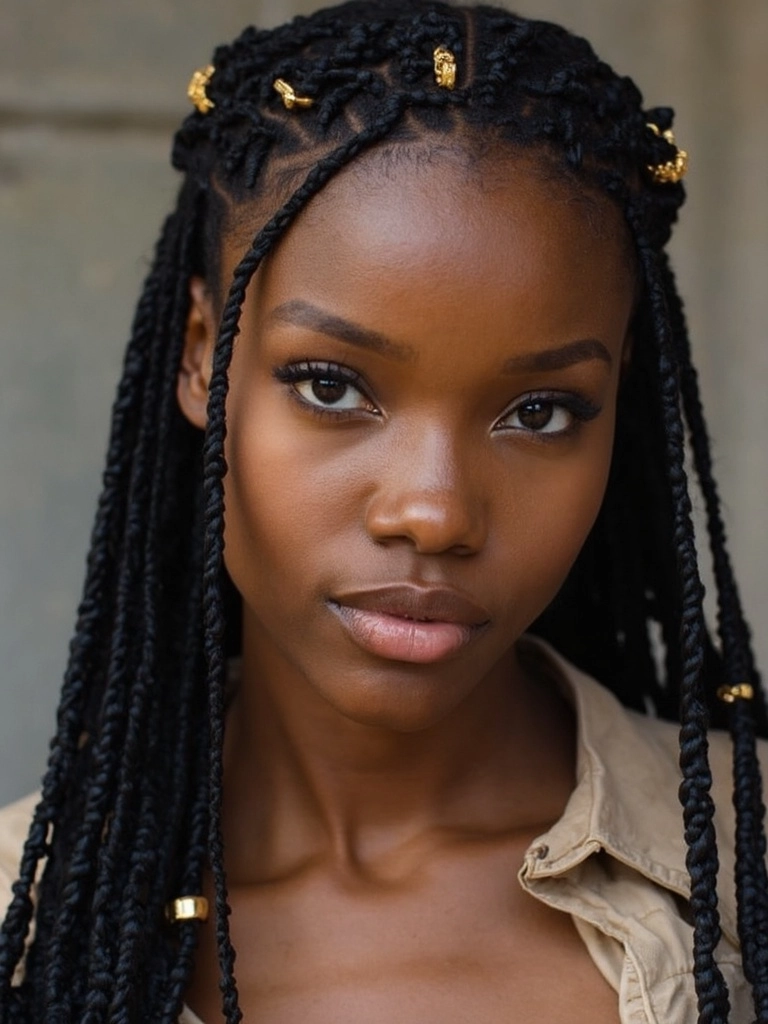
Cornrows are one of the most enduring styles in braiding, known for their intricate designs and versatility. This style involves braiding the hair closely to the scalp in straight rows or unique patterns, from classic straight-back rows to elaborate zigzags and S-curves. Cornrows offer a structured look that’s perfect for both everyday wear and special occasions. They’re also a foundational style for other braid types, such as crochet braids or Fulani braids.
4.Senegalese Twists
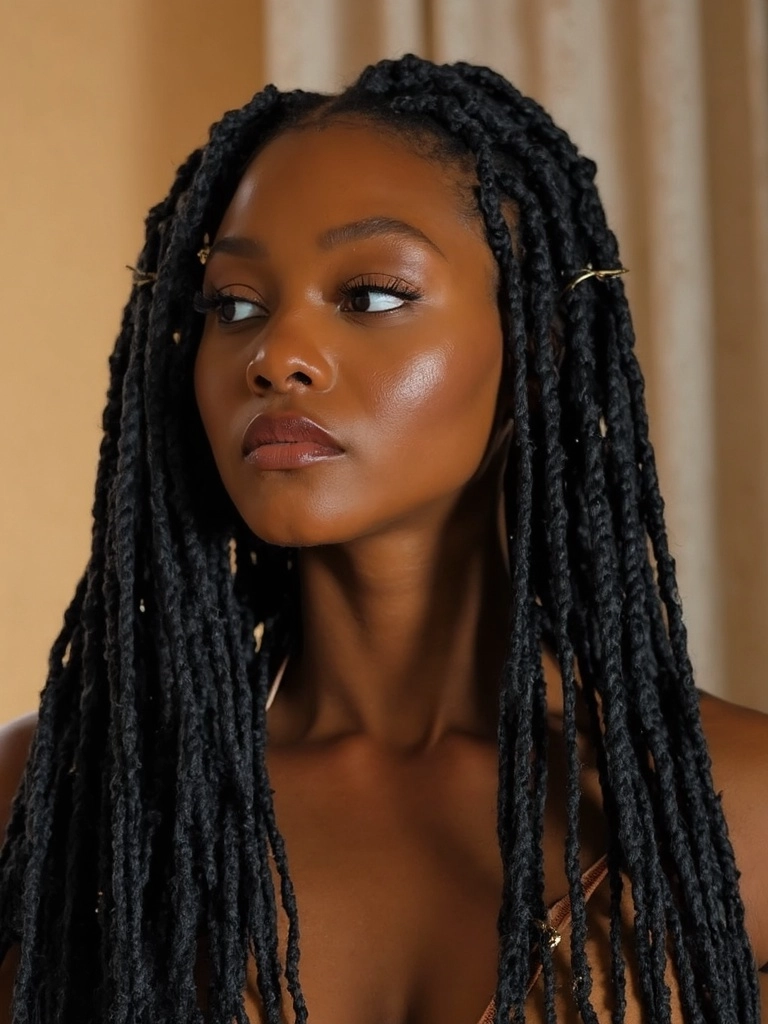
Also known as rope twists, Senegalese twists are a popular alternative to traditional braids. Created by twisting two strands of hair together, they offer a smooth, sleek finish that’s easy to maintain. Often worn long, Senegalese twists work beautifully for those who want a protective style with a more polished look. Adding extensions can give twists more volume and flexibility, while also protecting natural hair from breakage.
5.Fulani Braids
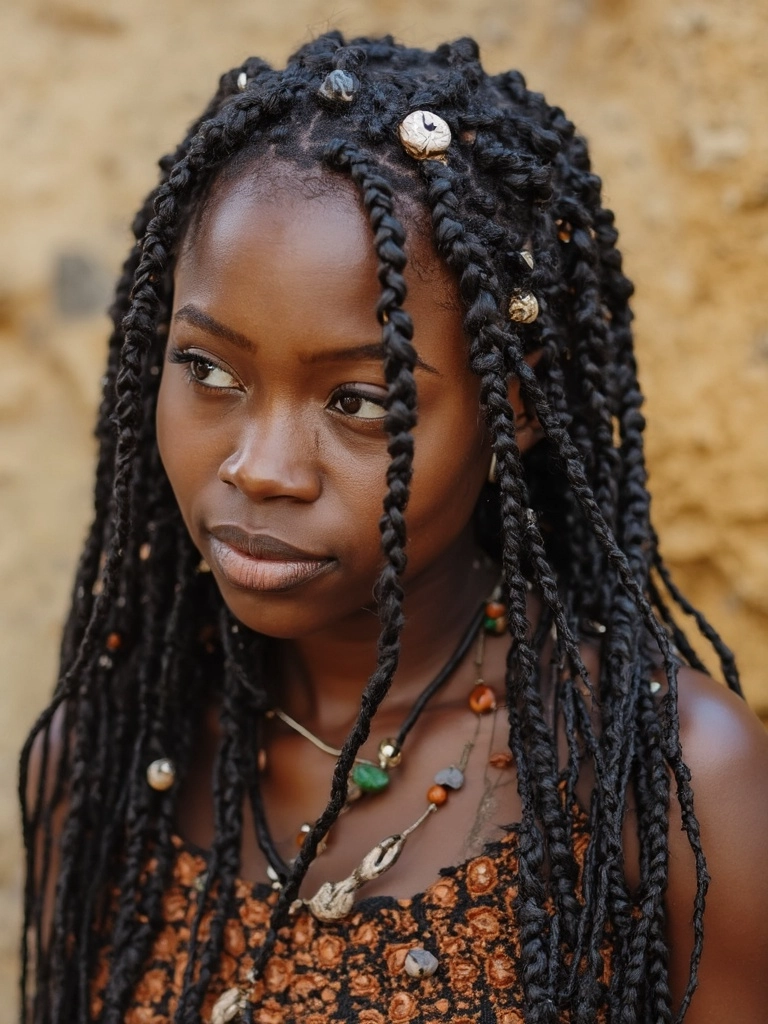
Inspired by the Fulani people of West Africa, Fulani braids incorporate patterns, accessories, and braids around the head, often accentuated with beads or cowrie shells. This style is unique in its use of both forward-facing braids around the crown and back-facing cornrows. It’s an eye-catching choice that’s rich in cultural significance and can be adapted to fit both formal and casual settings.
Each of these styles celebrates Black hair’s natural texture and resilience, offering not only a chance for self-expression but also crucial protection against environmental damage. Whether you’re looking for a long-term solution like box braids or something more intricate like Fulani braids, there’s a style to match every mood and occasion.
How to Prepare Your Hair for Braiding
Before starting any braiding style for the first time, it’s essential to prepare your hair properly to ensure a smooth process and protect against breakage. Proper preparation not only helps the braids last longer but also minimizes tension on your scalp and keeps your hair healthy throughout the wear. Follow these steps to prepare your hair for the braiding process:
1.Cleanse and Condition
Begin with a thorough cleanse to remove any buildup of oils or products that may prevent your braids from holding well. Use a gentle, sulfate-free shampoo to avoid stripping moisture from your hair, followed by a moisturizing conditioner to keep your hair hydrated. This step is especially important for those with naturally curly or coily hair, as braiding on well-moisturized hair reduces frizz and ensures a cleaner look.
2.Deep Condition for Extra Moisture
After washing, consider using a deep conditioning treatment or a protein treatment, depending on your hair's needs. Deep conditioners with ingredients like shea butter or coconut oil provide intense hydration, which is crucial for maintaining elasticity and preventing breakage. If your hair is prone to dryness, this extra moisture will help it withstand the tension of braiding.
3.Detangle Thoroughly
Detangling is crucial to avoid knots and breakage during braiding. Use a wide-tooth comb or a detangling brush to work through your hair in small sections, starting from the ends and moving up to the roots. For added slip, apply a leave-in conditioner or a lightweight oil, which can also serve as a layer of protection against friction as you braid.
4.Stretch or Blow-Dry Your Hair
To achieve a smooth finish, you may want to stretch your hair or use a blow-dryer on a low heat setting to elongate curls. Stretching your hair not only makes it easier to braid but also reduces the risk of tangling and breakage while handling. If you prefer not to use heat, try alternative methods such as using rubber bands, banding, or twisting to stretch your hair safely.
5.Section and Clip
Once your hair is clean, moisturized, and detangled, divide it into sections with clips or ties to make the braiding process more manageable. Start with four to six sections depending on your hair's thickness and length. Sectioning helps keep the hair organized and allows you to work through each braid with precision, especially for intricate styles like cornrows or knotless braids.
6.Choose the Right Products
Use lightweight products like leave-in conditioners, oils, and setting foams that won’t weigh down your hair or cause product buildup. Oils like jojoba or argan oil can help seal in moisture without making the scalp greasy. Avoid heavy creams or gels, as these can cause residue and build up over time.
Taking these steps before braiding ensures your hair is protected and better able to handle the style. By keeping your hair clean, moisturized, and well-prepared, you’ll enjoy a longer-lasting style that not only looks great but also maintains your hair’s health.
How to Braid Black Hair: Step-by-Step Techniques
Braiding Black hair can seem intimidating at first, but with patience and the right approach, you can master a range of beautiful styles. Here’s a breakdown of the steps to create three popular braiding styles: box braids, knotless braids, and cornrows.
1. Box Braids
Step 1: Section the Hair
Begin by sectioning the hair into small squares. Use a rat-tail comb to create clean parts, securing each section with clips or small elastics. The size of each section will determine the thickness of the braids, so adjust according to your preference.
Step 2: Add Extensions (Optional)
To add length or volume, incorporate braiding hair extensions. Take a small piece of the extension and wrap it around the base of the natural hair section, securing it by weaving it in with the natural hair. Be sure to grip tightly at the base to ensure a secure hold.
Step 3: Braid Downward
Divide the hair in each section into three equal parts and braid downward. Maintain consistent tension as you work to keep each braid uniform. Continue this process until you reach the end of the hair, then secure it with a small elastic or dip it in hot water to seal, if using synthetic hair.
2. Knotless Braids
Step 1: Prep and Section
Similar to box braids, start by sectioning the hair. With knotless braids, you’ll add extensions gradually, making them a gentler option on the scalp.
Step 2: Start with Natural Hair
Begin braiding each section without any added hair to create a natural look at the scalp. After a few stitches, start incorporating small sections of braiding hair to build thickness and length.
Step 3: Continue Braiding and Seal the Ends
Keep adding small pieces of hair as you move down the braid, creating a seamless, knot-free look. Once you reach the end, secure it by either knotting or using hot water to seal synthetic hair.
3. Cornrows
Step 1: Part the Hair
Start with clean, evenly parted sections along the scalp. Cornrows can be done in straight-back rows or creative patterns, depending on your style preference.
Step 2: Braid Close to the Scalp
To create a cornrow, divide a small section near the front of the scalp into three parts. Begin braiding, adding small sections of hair from the scalp each time you cross a piece over. This technique keeps the braid close to the scalp.
Step 3: Secure the Ends
Continue braiding along the scalp until you reach the nape of the neck, then braid the remaining length of hair freely. Secure the ends with an elastic, or incorporate them into other styles if you’re doing cornrows in combination with other braids.
By following these steps, you can create braids that are not only protective but also versatile and attractive. Each of these styles can be worn as-is or dressed up with accessories for a unique look that suits your personality.
How to Accessorize Your Braids
Adding accessories to braids allows you to personalize your style, paying homage to cultural traditions while embracing modern trends. Accessories can also be practical, helping to secure ends or keep braids in place. Here are some popular options:
1.Beads and Cuffs
Beads are a staple in many traditional African hairstyles and remain popular today. They come in various materials—wood, metal, plastic—and can be arranged in different patterns for a unique look. Hair cuffs, usually metallic, clip onto braids and give a refined or bohemian finish, depending on their design. Beads can be threaded onto the ends or woven into the length of the braid for added style.
2.Ribbons and Thread
Adding colorful thread or ribbon to braids is a versatile way to enhance the look. Thread is wrapped around sections of braids, giving them a pop of color or a contrasting texture. This accessory works particularly well with styles like box braids or cornrows, providing extra visual interest.
3.Cowrie Shells
Cowrie shells are often used in Fulani braids or other traditional styles to add cultural depth and symbolism. Easily threaded onto braids, cowrie shells are lightweight and look stunning in updos or single braids around the face.
4.Scarf Wraps
Wrapping a scarf around the crown or the base of a bun can give braids a bold, chic look. Scarves protect the braids from wear and offer a quick way to change up the style for formal or casual settings. Select scarves in patterns and colors that complement your outfit, allowing you to incorporate them into both everyday wear and special occasions.
These accessories allow you to get creative, elevating your braids from simple styles to stunning, personalized looks that reflect your personality and heritage.
Tips for Maintaining Healthy Braids
Keeping your braids looking fresh and maintaining healthy hair underneath is essential for long-lasting style. Proper braid care not only prevents frizz and buildup but also ensures your natural hair remains strong and moisturized. Here are effective tips to maintain your braids:
1.Moisturize Regularly
Moisture is key for both the braids and the natural hair underneath. A light leave-in conditioner or a spray mist with water and a few drops of oil can help maintain hydration without causing buildup. Oils like jojoba and tea tree oil are particularly beneficial as they hydrate the scalp while also preventing itching and flakiness.
2.Protect at Night
Wrap your braids in a silk or satin scarf before bed to reduce friction, which can lead to frizz and breakage. Alternatively, using a satin pillowcase provides a smooth surface that helps braids stay in place and reduces the risk of breakage. This practice is especially helpful for styles like knotless braids, which benefit from gentle handling.
3.Cleanse the Scalp
Keeping the scalp clean is crucial for any long-term braid style. Use a diluted shampoo to gently cleanse the scalp without soaking the braids, which can cause loosening. Alternatively, you can use a cleansing spray specifically designed for braids to remove buildup without disrupting the style. Cleansing every 2-3 weeks is generally enough to maintain a fresh and itch-free scalp.
4.Handle Braids with Care
Avoid excessive pulling or styling that strains the scalp, as it can lead to hair thinning and breakage, especially around the hairline. Protective styles like braids are meant to protect, so be cautious not to add unnecessary tension by frequently re-styling or pulling braids too tightly.
5.Limit the Wear Time
While braids can last up to eight weeks with good care, it’s best to remove them after about six weeks to prevent matting and damage. This timeline allows your natural hair to rest before re-braiding and prevents the strain that can lead to hair loss over time.
Following these steps ensures your braids not only look great but also protect your natural hair. Proper maintenance helps maximize the style’s longevity and keeps your hair healthy, allowing you to enjoy braids as a consistent, protective choice.
Braiding Black hair can be an empowering experience that combines beauty, functionality, and a deep respect for cultural tradition. Whether you’re going for the bold look of box braids, the gentle touch of knotless braids, or the classic appeal of cornrows, preparation and care are key. By keeping your hair moisturized, protecting it at night, and cleansing your scalp regularly, you can ensure that your braids remain stunning and protective.
Remember, it’s important to remove braids after a reasonable wear period to give your hair a rest and prevent breakage. Experiment with accessories like beads, cowrie shells, and scarves to add a personal flair, and don’t hesitate to explore new styles that make you feel confident and comfortable. Each braid is more than a hairstyle—it’s a statement of individuality, resilience, and heritage.
Whether you’re braiding at home or with a professional, embrace the process as part of your self-care routine. With the right techniques and dedication, braids can offer both the protection your hair needs and the beauty you desire.
FAQs on How to Braid Black Hair
1. How long do box braids last?
Box braids can last anywhere from 4 to 8 weeks, depending on care and hair type. Regularly moisturizing the scalp, covering your braids at night, and minimizing heavy styling help prolong their lifespan and keep them looking fresh.
2. Can I braid my own Black hair?
Yes, with practice and patience, you can learn to braid your own hair. Starting with simpler styles like cornrows or two-strand twists can help beginners develop braiding skills. Many find that box braids or knotless braids are manageable with practice and the right tools.
3. What products work best for braided hair?
Lightweight products are ideal for braids, such as leave-in conditioners, scalp oils (e.g., tea tree or jojoba oil), and braid sprays that add moisture without buildup. Avoid heavy creams and gels, as these can cause residue that’s difficult to clean without disrupting the style.
4. How can I reduce scalp tension from braids?
Knotless braids are an excellent choice for reducing scalp tension, as they start with your natural hair and gradually incorporate extensions. When braiding, avoid overly tight sections around the hairline, and take breaks between braiding sessions to prevent strain on your scalp.
5. What should I do if my scalp starts itching with braids?
An itchy scalp is a common issue with braids. Use a soothing, water-based scalp spray to keep your scalp hydrated, and apply a few drops of tea tree or peppermint oil, which can relieve itching. Regular scalp cleansing every 2–3 weeks can also prevent buildup that leads to irritation.

